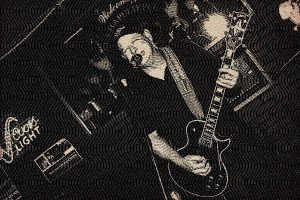
Hello everyone! Welcome back to Wild Bill’s Music Notes! For this article, I am going to discuss sound, and ways bands that set up their own shows, can improve the sound at their gigs. A while back, I took a great seminar from a sound engineer with the Peavey sound company, and learned some great general concepts and tips that I will share here. I hope this will help the bands who set their own sound and play in smaller venues. I will be concentrating on mixes, sound ratios, and blending to help bands get control of their sound. For this article, I will assume bands know how to fully operate their sound systems and set their monitor settings. In larger clubs, the great sound engineers have things covered. This is for the bands that set up their own sound at gigs.
What Is Great Sound?
Great band sound at any venue is when the audience can hear all the instruments easily, are blended and mixed smooth, and the vocals can be heard and understood easily above the instruments. It is extremely important that the vocals volume level is much louder than the total instrument sound level. If the level is too low, the vocals will be buried in the mix and not understood. A very common mistake for bands is to set the vocal volume too low, and equal to the total instrument volume. The vocals must always have a large headroom above all the instruments, but not too loud. There is a golden vocal headroom ratio you want to achieve. Think of the vocal/instrument ratio like this: If the “total” instruments maximum volume is at level 7
as an example, then the vocals volume should be at level 10. Always. That is the headroom ratio requirement needed for the vocals to sound right. Important to look at it visually.
Vocals Volume Level Always Here —————— Volume level 10 (headroom)
Total Band Instrument Level Always Here ———- Volume level 7
Set Instruments Stage Levels First
Time to set the instruments stage volume, and input/trim(gain) to the soundboard. Vocals will be later. First, mic all instruments and kick drum and send to the soundboard. With the mains off, have the drummer and bass player play something. With the drummer playing at full normal volume, set the bass amp volume to blend with the drums. Adjust the bass amp EQ so it is a very full sound and compliments the drums but does not overshadow the drums. A common mistake is to set the bass way too loud. Set the bass so it is full, but so it blends with the drums well. Make sure you can hear the drums just right with the bass.
Now have the guitarist join in. Set the guitar amp volume and EQ so it blends with bass and drums just right, making sure it still cuts through but not too loud. Also, make sure the guitarist’s lead boost volume is set loud enough above the rhythm level to cut through just right. Repeat with all instruments until they are blended well together. The stage sound is now set. Do not touch any instrument amp volumes or EQ settings the rest of the show except for minor adjustments!
Set The Instrument Input/Trim Levels On Soundboard
With the mains off, set the input/trim levels for all instruments and vocal mics on the soundboard. To set the instruments input/trim, have each instrument play one at a time. Set their input/trim level on the soundboard to just below the red clipping/distortion light. Repeat with all instruments and kick drum. Set the input/trim level on each instrument and kick drum to the highest level possible without red. In smaller venues, only mic the kick drum. All other drums and cymbals will cut through unmic’d. A powered subwoofer or two is recommended in your sound system.
Set Vocal Mics Input/Trim Levels
With mains still off, set all the vocal mics input/trim on the soundboard. Have one person say “check” as loud as they can into each mic. While the person yells check loud into the mic, set the input/trim so there are no red clipping/distortion lights coming on. Set as high as you can without the red coming on. No red allowed ever. Later, when the whole band is playing, make sure no red lights pop up on the input/trim levels. If they do, turn them down just until the red clipping/distortion light goes out. No lower.
Set Instrument Mains
Turn the mains on. Have the drums and bass guitar play something. Bring the bass level up until it is a full sound and blends with the drums good. Bring the kick drum level up to blend with bass and rest of drums. Adjust bass and drums EQ. Have the guitar, and all other instruments join in with the bass and drums. Bring their level up to blend with bass/drums. Set their EQ’s. Make the band blend as one, and sound sweet! Now the instrument sound is set for the rest of the night except for minor adjustments. Leave all settings and volume the same all night for
sound consistency for the audience. Do not touch the volume levels of the instruments the rest of the night except for “minor” individual adjustments
Set The Vocal Mics
It is time to set the lead vocals in the mains. Have the band play a song. While band is playing at full show volume, bring up the lead vocal mic so it is well above the total band volume. A common mistake is to set the lead vocal too close to the total band volume. Set the vocal/band headroom ratio as I described above. Once the volume is set on the lead vocal mic, do not touch it. Show volume must be consistent and the same for the audience the whole night. Now
adjust the lead vocals EQ. Set the bass so it is full but not boomy with less better than too much. Now set the treble so the singer’s “S’s” and “T’s” are clear but not shrilly. Set just to the clear point. Set the mids to smooth out the vocals or add a little bite.
Set the Backing Vocal Mics
A common mistake when setting the backing vocal mics is setting them too low in volume compared to the lead vocal mic. The backing level mics should only be slightly lower in volume. If the lead vocal mic is set at 10 (for instance), then “all” the backing mics should be set to 9. All the volumes on all backing mics should be set equal. The EQ must be the same on all mics as well. Tone must also be consistent. Vocals have to consistent across the stage. There cannot be one mic loud, and one mic soft. It does not sound right. In addition, there cannot be one vocal mic clear, and the backing mics muddy and bassy. Almost Showtime!
Write Down All Settings
Now that sound check is finished, it is time for the most important step. Photograph or write down every single instrument amp setting, EQ setting, and all soundboard settings. Write down every setting and mark what venue it is for. For the next gig, set up identical and set all sound settings just as photographed. With luck, you will not have to change any settings and sound will already be set. After you set up and set everything the same as the last gig, have the band play a song. Adjust the master volume for the mains. That should be all that is needed. By writing down all the settings, you just saved a whole lot of time and effort for future sound checks. Photograph each setting for each gig, and mark those settings for that venue. Next time you come back to each venue, just set everything the same for that venue and no sound check
needed!
Sound Is Set
Now that the sound is set, do not touch ant settings the rest of the night. The audience needs sound consistency. They did not come to watch sound adjustments, they came to see a show and be entertained. I hope this helps some bands out there. My columns will run once a month on the first Thursday of the month. Keep Rocking! -WB
By Wild Bill McClintock
Next Month (5/31/18): How Tom Petty and the Heartbreakers wrote and recorded their hits!


